Dirt pudding has been a staple in my family for as long as I can remember, especially for birthdays and summer barbecues. There’s something magical about the combination of creamy chocolate pudding, crushed cookies that mimic rich soil, and those fun gummy worms peeking out. This Oreo dirt pudding recipe is my go-to because it’s so incredibly easy to whip up, even on a busy weeknight, and the kids absolutely adore it. The way the chocolate pudding melds with the crunchy Oreos is pure bliss, creating a dessert that’s both nostalgic and utterly delicious. Let’s get this delightful dessert made!
Why You’ll Love This Dirt Pudding
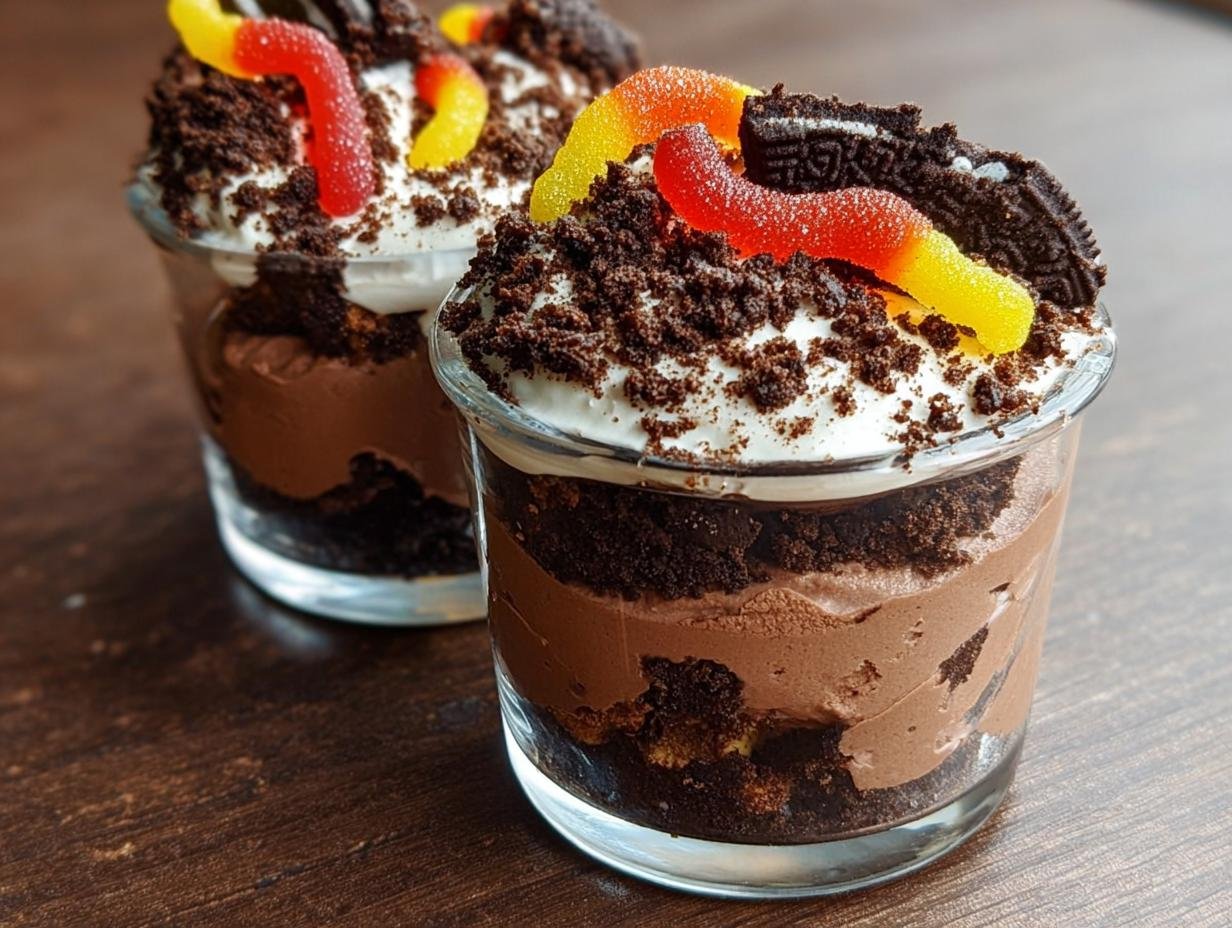
This dirt pudding is a guaranteed crowd-pleaser for so many reasons! It’s incredibly simple to assemble, making it perfect for even novice bakers. Plus, the visual appeal is unbeatable, especially when served as individual dessert cups with cookies.
- It’s a no-bake wonder, saving you precious oven time.
- The creamy texture is absolutely divine.
- It’s a fantastic make-ahead dessert for parties.
- This easy dirt pudding recipe is perfect for involving kids in the kitchen.
- The combination of chocolate pudding and Oreos is a classic for a reason.
- It’s adaptable to your favorite cookie or candy additions.
- The playful presentation with gummy worms is always a hit with children.
Ingredients for Dirt Pudding
Gathering your dirt pudding ingredients is the first step to creating this delightful treat. This recipe focuses on achieving that perfect balance of flavors and textures, especially with the classic pairing of chocolate pudding with Oreos.
- 2 (3.5-oz.) packages instant chocolate pudding mix – This is the base for our creamy, chocolatey goodness.
- 3 cups whole milk – Essential for properly thickening the pudding mix.
- 2 cups cold heavy cream – We’ll whip this to create a light and airy topping that complements the pudding.
- 1/4 cup powdered sugar – To sweeten the whipped cream just right.
- 1 tsp. pure vanilla extract – Enhances the sweetness and adds a lovely aroma to the whipped cream.
- 1 (14-oz.) package Oreos, crushed, divided (about 2 cups) – These create the ‘dirt’ effect and add a wonderful cookie crunch.
- Gummy worms, for garnish – The playful finishing touch that makes this dessert a hit with kids!
Having these simple yet effective dirt pudding ingredients on hand ensures you’re ready to whip up this amazing dessert.
How to Make Dirt Pudding
Whipping up this homemade dirt pudding is so satisfying, and the result is a truly decadent and creamy chocolate delight. You’ll love how simple these steps are!
- Step 1: Prepare the pudding. In a large bowl, whisk together the two packages of instant chocolate pudding mix and the 3 cups of whole milk until everything is completely combined and smooth. Let this mixture sit for about 3 minutes; you’ll see it start to thicken up beautifully, creating that rich base for our dessert.
- Step 2: Make the whipped cream. Grab your stand mixer with the whisk attachment, or a trusty hand mixer and a large bowl. Beat the 2 cups of cold heavy cream with the 1/4 cup of powdered sugar and 1 teaspoon of pure vanilla extract. Keep going until stiff peaks form – this means the cream is firm enough to hold its shape, which is key for a luscious texture.
- Step 3: Combine pudding and whipped cream. Now for the magic! Gently fold the fluffy whipped cream and about one-third of your crushed Oreos into the thickened chocolate pudding mixture. Use a spatula and a light hand to incorporate everything evenly. You want to maintain that airy texture from the whipped cream, creating a wonderfully smooth and creamy chocolate pudding.
- Step 4: Assemble the dessert. It’s time to bring it all together! Divide the pudding mixture evenly between your serving cups or, if you prefer, transfer it all into a trifle dish. Garnish each serving generously with the remaining crushed Oreos, making sure to get a good layer of that ‘dirt.’ Finally, add those fun gummy worms on top for a playful, eye-catching finish that kids absolutely adore. This easy dirt pudding is almost ready to enjoy!
Pro Tips for the Best Dirt Pudding
Want to elevate your dirt pudding game from good to absolutely spectacular? I’ve picked up a few tricks over the years that make all the difference in achieving that perfect, craveable texture and flavor.
- For the ultimate creamy texture, make sure your heavy cream is ice cold before whipping. This helps it achieve stiff peaks much more easily.
- Don’t overmix when folding the whipped cream and cookies into the pudding. Gentle folding preserves the airiness, which is key for that light, fluffy consistency.
- Chill the assembled dirt pudding cups for at least 30 minutes before serving. This allows the flavors to meld beautifully and the crushed Oreos to soften just slightly.
- Experiment with different cookie bases! Chocolate chip cookies or even vanilla wafers can offer a fun twist on this classic dessert.
What’s the secret to perfect Dirt Pudding?
The real secret to the best dirt pudding is using cold heavy cream for your whipped topping and resisting the urge to overmix. Folding gently ensures a light, airy texture that contrasts perfectly with the richer pudding and cookie layers.
Can I make Dirt Pudding ahead of time?
Absolutely! You can prepare this dirt pudding dessert up to 24 hours in advance. Assemble it completely, cover it tightly with plastic wrap, and store it in the refrigerator. The flavors will meld even better!
How do I avoid common mistakes with Dirt Pudding?
A common pitfall is overmixing, which can make the pudding dense. Another is not chilling long enough; give it time to set for the best texture. Also, ensure your pudding mix is fully dissolved in the milk to avoid grainy spots. For more tips on creating delicious desserts, check out these dessert recipes.
Best Ways to Serve Dirt Pudding
This fun and whimsical dessert is fantastic served in individual cups, making it super easy for guests to grab and enjoy. It’s a perfect addition to any party spread, especially when you’re serving a crowd of little ones who will absolutely adore the playful presentation. Think of it as the ultimate dirt pudding for kids!
- Individual Cups: Layer the creamy chocolate pudding, crushed Oreos, and whipped cream into clear plastic or glass cups. Top each with a few gummy worms to create a delightful gummy worm dessert that looks like a mini garden.
- Trifle Dish: For a more elegant presentation, layer everything in a large glass trifle dish. This allows everyone to see the beautiful strata of pudding, cookie crumbs, and cream, making it a stunning centerpiece.
- Party Buffet Staple: Set out the prepared cups or trifle dish alongside other party favorites like fruit salad or mini sandwiches. It’s a guaranteed hit that complements other sweet and savory options beautifully.

Nutrition Facts for Dirt Pudding
This delightful dirt pudding dessert is a fun treat, and here’s a breakdown of what you can expect per serving. Knowing the nutritional details helps you enjoy this classic treat mindfully. For a healthy side, consider a mediterranean chickpea salad.
- Calories: 370
- Fat: 24g
- Saturated Fat: 14g
- Protein: 5g
- Carbohydrates: 33g
- Fiber: 2g
- Sugar: 28g
- Sodium: 160mg
Nutritional values are estimates and may vary based on specific ingredients and portion sizes used.
How to Store and Reheat Dirt Pudding
This delightful dirt pudding dessert is best enjoyed fresh, but I’ve found it stores beautifully if you have any leftovers (which is rare in my house!). Proper storage ensures it stays just as delicious as when you first made it.
- Cool Completely: Before storing, always let the dirt pudding cool down to room temperature. Putting warm pudding directly into airtight containers can create condensation, making it soggy.
- Airtight Containers: Store the pudding in individual airtight containers or a large container with a tight-fitting lid. This prevents it from absorbing odors from other foods in the refrigerator and keeps it fresh.
- Refrigerator Storage: Keep your dirt pudding in the fridge for up to 3 to 4 days. The creamy texture and cookie crumble hold up well during this time.
- Freezer Storage: If you need to store it longer, you can freeze your dirt pudding for up to 3 months. Wrap it very well in plastic wrap and then foil to prevent freezer burn.
- Reheating: There’s no real reheating needed for this no-cook dessert! If frozen, thaw it overnight in the refrigerator first. The textures might change slightly after freezing, but it will still be tasty.
Frequently Asked Questions About Dirt Pudding
What’s the best way to make dirt pudding?
The best way to make this dirt pudding recipe involves using quality ingredients and following the layering technique precisely. Start by preparing your instant chocolate pudding according to package directions, then whip your heavy cream until stiff peaks form. Gently fold the whipped cream and a portion of crushed Oreos into the pudding. Layer this mixture with more crushed Oreos in serving dishes, topping with gummy worms for that signature look. For a similar simple preparation, try this easy avocado toast recipe.
Can I use a different type of pudding mix?
While chocolate is classic, you can absolutely experiment with other pudding flavors! Vanilla, butterscotch, or even cheesecake flavored pudding mixes can create delicious variations. Just ensure you’re using instant pudding mixes, as they are designed to thicken quickly without cooking, which is essential for this no-bake dessert. The method for how to make dirt pudding remains the same, regardless of the pudding flavor.
How do I get the best ‘dirt’ effect?
For the most authentic ‘dirt’ look, use chocolate sandwich cookies like Oreos and crush them finely. You can pulse them in a food processor until they resemble coarse crumbs, or place them in a zip-top bag and crush them with a rolling pin. Reserve some larger cookie pieces for a more varied texture. This simple step really elevates the appearance of your dirt pudding dessert. If you’re interested in baking, consider learning about barley, a versatile grain.
Is this dirt pudding recipe suitable for very young children?
Yes, this dirt pudding recipe is a fantastic choice for young children! It’s fun, visually appealing with the gummy worms, and the taste is universally loved. Plus, it’s a no-bake dessert, making it safe for kids to help prepare. Just ensure the gummy worms are age-appropriate and supervise younger children around any small crumb pieces.
Variations of Dirt Pudding You Can Try
Get ready to explore some fun dirt pudding variations that can take this classic dessert in exciting new directions! Whether you’re catering to dietary needs or just craving a new flavor profile, there’s a twist for everyone. These ideas are sure to make your dirt pudding the ultimate kids’ favorite pudding.
- Gluten-Free Delight: Swap out the traditional Oreos for your favorite gluten-free chocolate sandwich cookies. The texture might be slightly different, but the chocolatey, creamy goodness remains, making it accessible for more people.
- White Chocolate Raspberry: Try using white chocolate pudding mix and fresh raspberries layered with crushed vanilla wafers instead of Oreos. It offers a lighter, fruitier flavor profile while still being incredibly delicious.
- Peanut Butter Lover’s Dream: Combine chocolate pudding with peanut butter or use peanut butter flavored pudding mix. Layer with crushed peanut butter cookies and perhaps some chopped peanut butter cups for an extra decadent treat.
- Vegan Version: Use vegan chocolate pudding, almond or oat milk, vegan whipped topping, and crushed vegan chocolate sandwich cookies. This variation proves that you don’t need dairy to enjoy this beloved dessert.

Dirt Pudding: Amazing 3-Step Recipe
- Total Time: 25 mins
- Yield: 5 servings 1x
- Diet: Vegetarian
Description
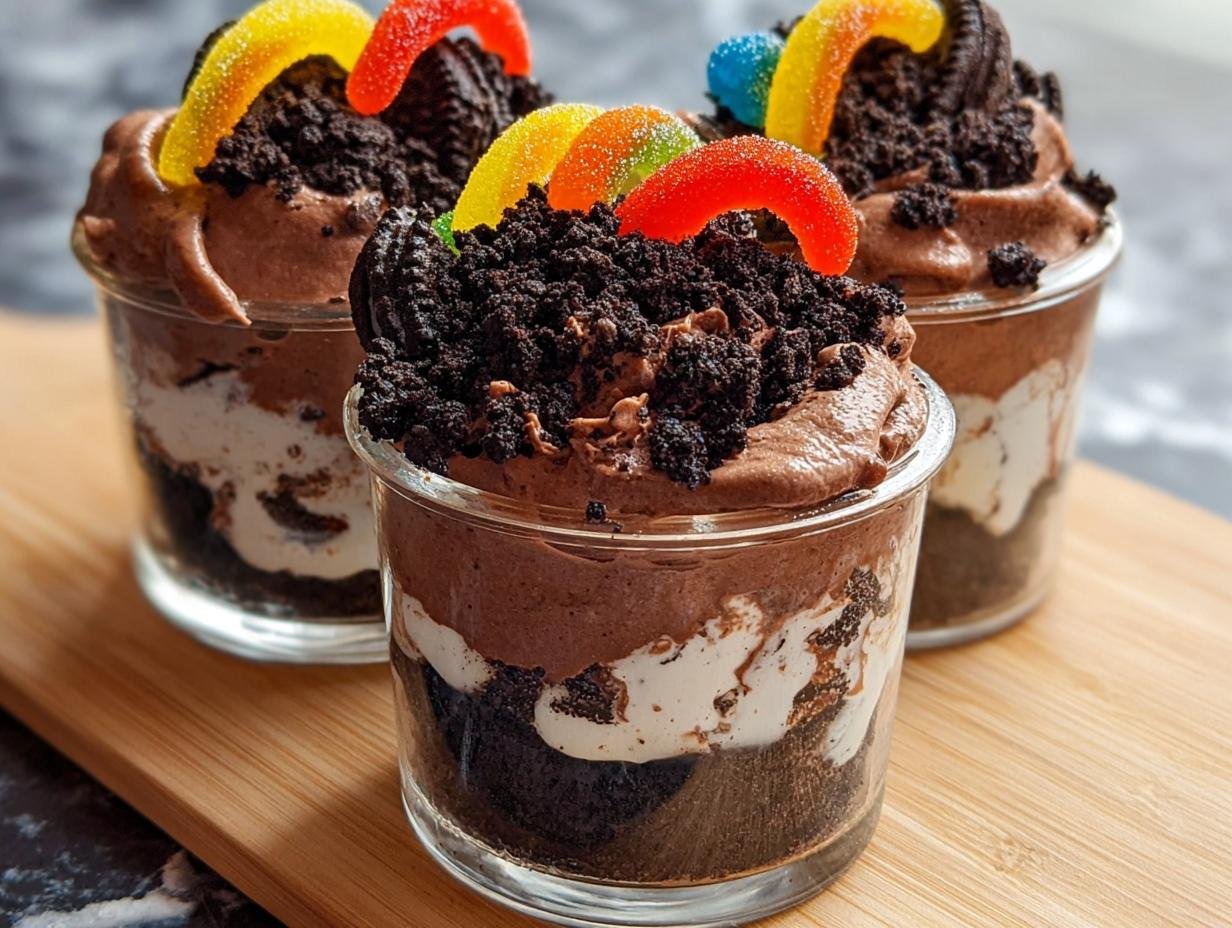
This delicious Dirt Pudding is a fun and creamy no-bake dessert featuring layers of chocolate pudding, whipped cream, and crushed Oreos, topped with gummy worms for a playful touch. Perfect for parties and kids’ gatherings, it’s easy to prepare and sure to delight.
Ingredients
- 2 (3.5-oz.) packages instant chocolate pudding mix
- 3 cups whole milk
- 2 cups cold heavy cream
- 1/4 cup powdered sugar
- 1 tsp. pure vanilla extract
- 1 (14-oz.) package Oreos, crushed, divided (about 2 cups)
- Gummy worms, for garnish
Instructions
- Prepare the pudding: In a large bowl, whisk together the instant chocolate pudding mix and milk until fully combined. Let the mixture sit for about 3 minutes to thicken.
- Make the whipped cream: Using a stand mixer with the whisk attachment or a hand mixer in a large bowl, beat the cold heavy cream with powdered sugar and vanilla extract until stiff peaks form, which ensures the whipped cream holds its shape.
- Combine pudding and whipped cream: Gently fold the whipped cream and about one-third of the crushed Oreos into the thickened chocolate pudding mixture until evenly incorporated, maintaining a light and fluffy texture.
- Assemble the dessert: Divide the pudding mixture between serving cups or transfer it into a trifle dish. Garnish each serving generously with the remaining crushed Oreos and add gummy worms on top for a fun, decorative finish.
Notes
- For a lighter version, you can use reduced-fat milk and whipping cream substitutes.
- Chilling the pudding mixture before assembling can enhance the dessert’s texture and flavor.
- Use different cookie varieties or candy for creative variations of this dessert.
- Prepare the dessert a few hours ahead and refrigerate to let flavors meld better.
- Prep Time: 10 mins
- Cook Time: 0 mins
- Category: Dessert
- Method: No-Cook
- Cuisine: American
Nutrition
- Serving Size: 1 serving (approximately 1 cup)
- Calories: 370
- Sugar: 28g
- Sodium: 160mg
- Fat: 24g
- Saturated Fat: 14g
- Unsaturated Fat: 8g
- Trans Fat: 0.2g
- Carbohydrates: 33g
- Fiber: 2g
- Protein: 5g
- Cholesterol: 80mg






Leave a Reply