
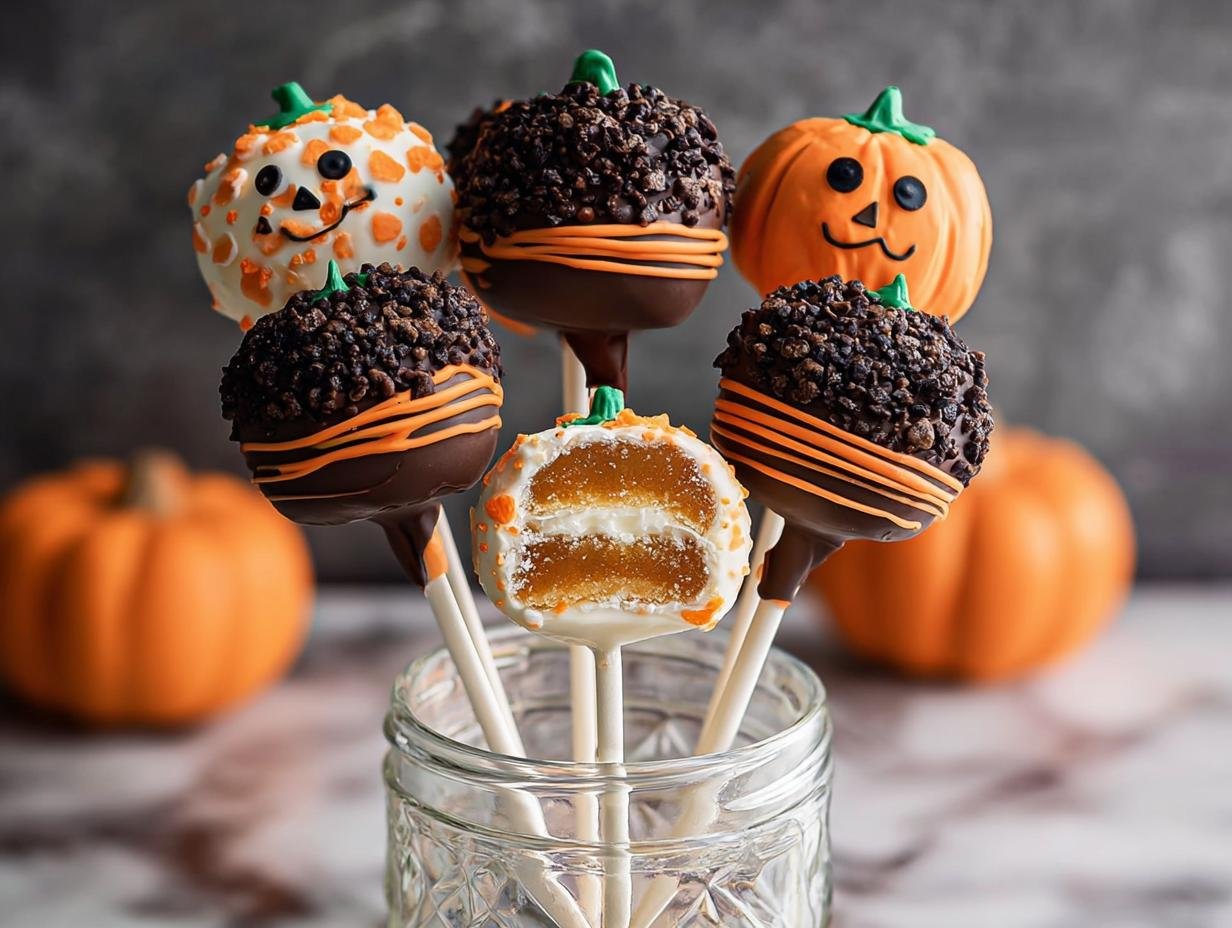
Halloween cake pop decorations have become my absolute favorite way to celebrate the spooky season! I remember the first time I attempted them a few years ago – a chaotic but fun afternoon of swirling orange and black chocolate. The smell of sweet cake and vanilla filled my kitchen, and seeing the delighted faces of friends when they bit into a perfectly decorated ghost or pumpkin was pure joy. These little treats are so versatile, from creepy crawly spiders to cute little monsters. They’re not just desserts; they’re edible art that brings a playful chill to any Halloween gathering. Get ready to craft some frightfully delicious delights, because we’re diving into some amazing Halloween cake pop ideas. Let’s get decorating!
Why You’ll Love These Halloween Cake Pops
You’re going to adore making these festive treats for so many reasons:
- They are incredibly fun to create and customize for any Halloween theme.
- These easy Halloween cake pops are perfect for beginners and seasoned bakers alike.
- They’re a guaranteed hit at any Halloween party, from kids’ gatherings to adult get-togethers.
- The process is engaging, making them a great activity for family or friends.
- You can easily adapt the designs to be spooky, cute, or even a bit creepy.
- These easy Halloween cake pops are surprisingly quick to assemble once you get the hang of it.
- They offer endless possibilities for creativity with colors, sprinkles, and edible decorations.
- Plus, they’re simply delicious – a perfect bite-sized sweet treat!
Ingredients for Festive Halloween Cake Pops
Gathering these items is the first step toward creating some truly memorable Halloween themed cake pops. The cake mix and butter form the base, while the powdered sugar and vanilla create a sweet, tender buttercream that binds everything together. Don’t worry if you don’t have a cake pop press; hands work just as well for shaping!
- 15 ounce box white cake mix – the foundation for our pops
- 1 stick salted butter, softened – for a rich, creamy buttercream
- 2-2 ½ cups powdered sugar – adjust for desired frosting consistency
- 1 teaspoon vanilla extract – adds a lovely sweet aroma and flavor
- 1 Tablespoon heavy cream or milk – helps achieve the perfect frosting texture
- 5 ounce chocolate melting wafers (dark chocolate) – for dipping and securing sticks
- 10 ounce package white chocolate melting wafers – a classic base for many designs
- 10 ounces orange melting wafers – essential for our pumpkin pops!
- Green frosting – for those adorable pumpkin stems
- Black edible ink pen – perfect for drawing spooky faces
- Optional: Halloween sprinkles, jimmies, or other desired decorations – let your creativity run wild!
How to Decorate Halloween Cake Pops
Ready to transform simple cake into spooky masterpieces? These steps will guide you through the entire process, from creating the perfect cake pop base to adding those final, frightful touches. I love how versatile this process is; it truly allows for endless Halloween cake pop ideas.
Step-by-Step Decoration Guide
Making the Cake Pop Base
First, let’s whip up a quick buttercream to bind our cake. In a medium bowl, cream softened butter until fluffy. Gradually add powdered sugar, vanilla extract, and a splash of cream until you have a thick, spreadable frosting. Next, crumble your slightly cooled white cake into fine crumbs. It’s important the cake isn’t too warm, or it’ll get mushy! Add about two spoonfuls of frosting to the crumbs and mix until the mixture holds together when squeezed, like playdough. If it’s too crumbly, add a tiny bit more frosting; too sticky, add a bit more cake crumbs. Scoop 1-inch balls and place them on a parchment-lined plate. Pop them in the freezer for about 10 minutes to firm up – this step is crucial for easy dipping!
Melting and Dipping Techniques
While the cake balls chill, melt your chocolates. I usually use dark chocolate for securing the sticks and white or orange for the main coating. Microwave dark chocolate wafers in 30-second bursts, stirring between each, until smooth. Dip the tip of a lollipop stick into the melted dark chocolate and insert it about halfway into a chilled cake ball. This acts like glue! Return them to the fridge or freezer until that chocolate sets firmly. Then, melt your white or orange chocolate wafers using the same microwave method. This is where the magic of Halloween edible decorations for cake pops really begins!
Creative Halloween Cake Pop Designs
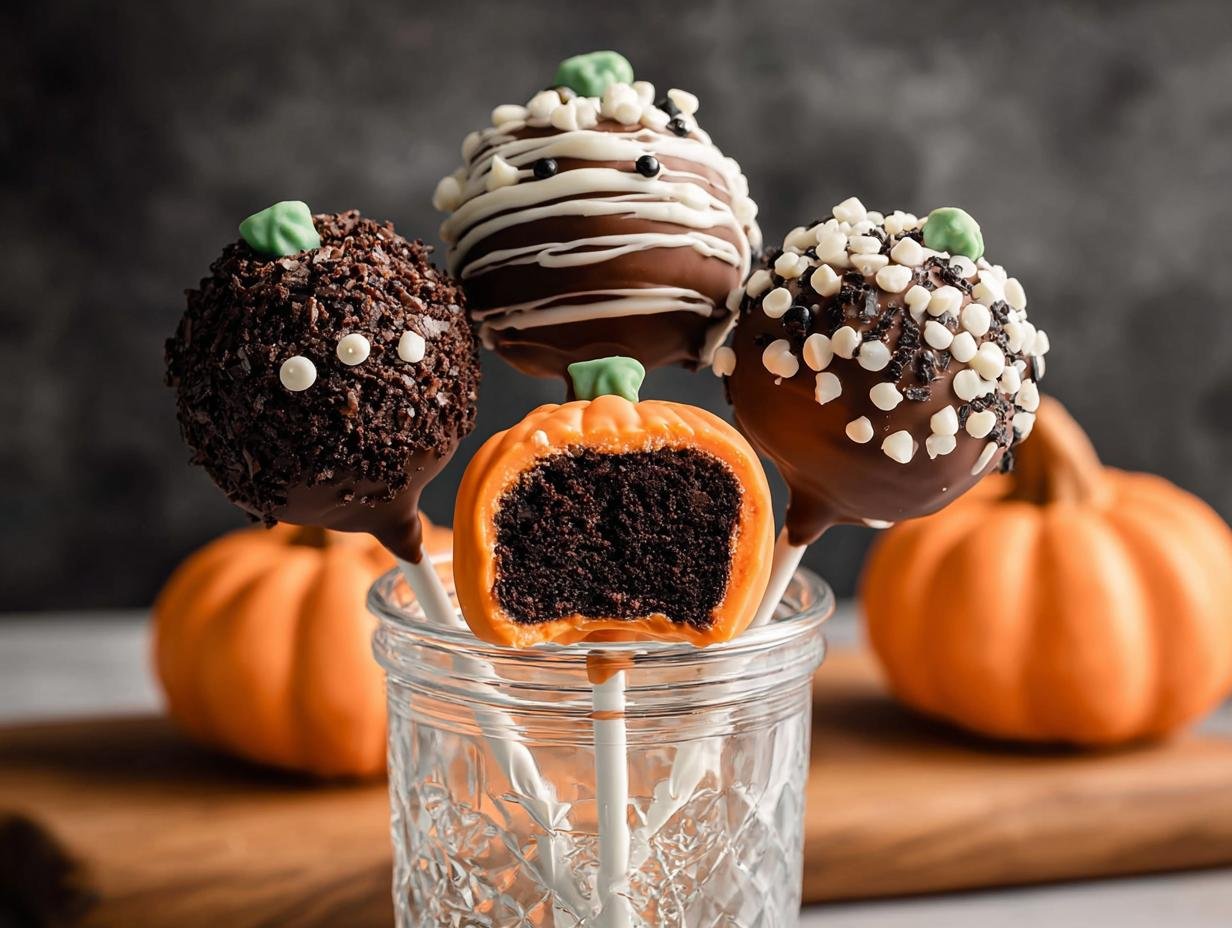
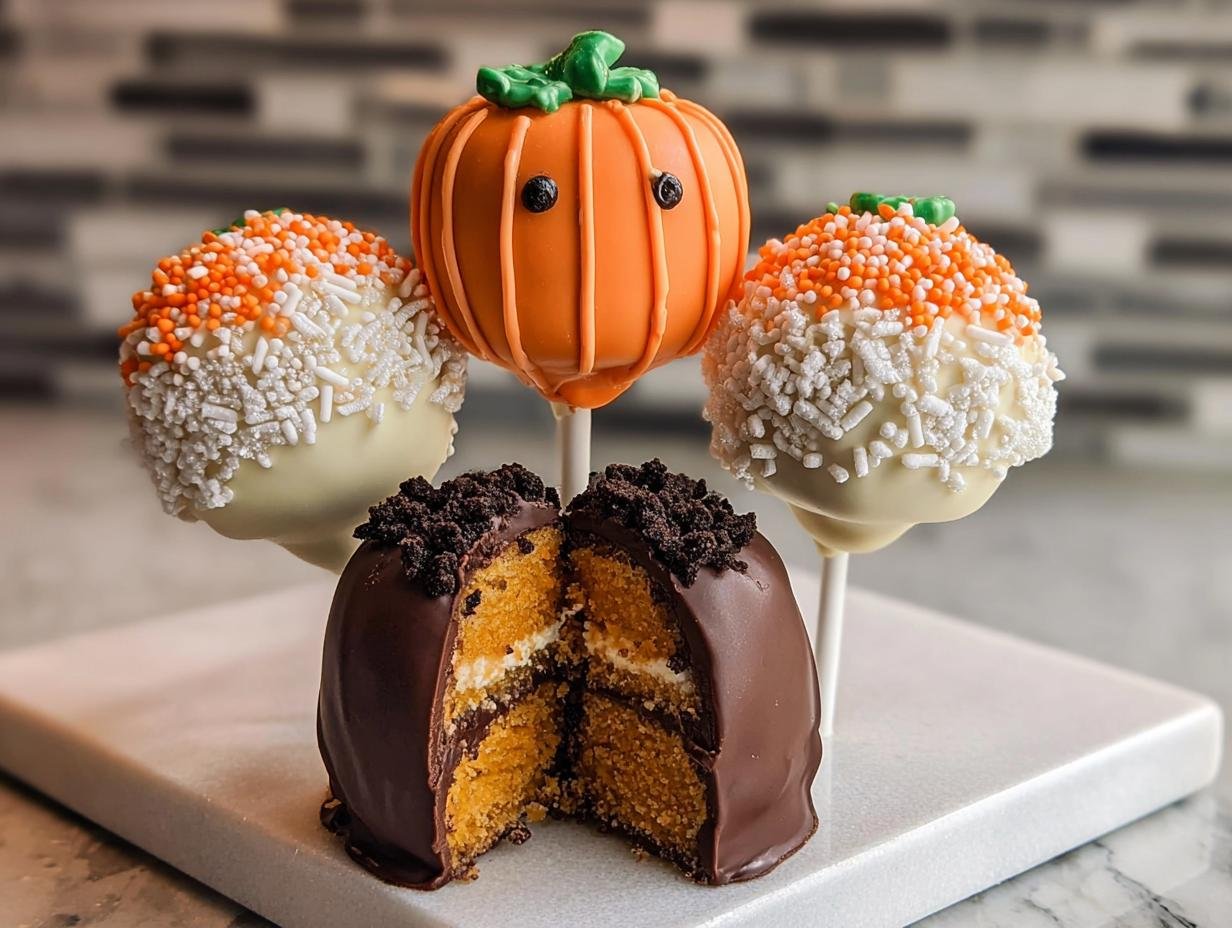
Now for the fun part – bringing our spooky characters to life! For pumpkins, dip the chilled cake pops into melted orange chocolate, letting the excess drip off. Before it hardens, pipe a little green frosting on top for a stem. Use a black edible ink pen to draw cute or creepy pumpkin faces. To create mummies, dip your pops in white chocolate. Once that layer is set, melt a bit more white chocolate, put it in a ziplock bag with a tiny corner snipped off, and drizzle thin lines back and forth to mimic bandages. This is where your spooky cake pop decorations truly shine! You can also create ghosts by dipping in white chocolate and adding two small black dots for eyes before the chocolate hardens, or use black frosting for spiderwebs.
Adding the Finishing Touches
This is where your easy Halloween cake pops get their personality! While the main chocolate coating is still wet, you can press on Halloween sprinkles, jimmies, or edible eyeballs. For those pumpkin faces, the black edible ink pen is your best friend. You can draw simple triangles for eyes and a jagged mouth, or get creative with more detailed designs. If you’re making monsters, use different colored frosting to add hair or ears. Experimenting with various Halloween cake pop frosting designs is key to making each pop unique and special. Don’t be afraid to get a little messy – that’s part of the fun!
Pro Tips for the Best Halloween Cake Pop Decorations
Want to elevate your spooky sweets? These tips will help you create professional-looking Halloween themed cake pops that wow your guests:
- Always let your cake pops firm up in the freezer for at least 10 minutes before dipping. This prevents them from falling apart.
- Work in small batches when melting chocolate. It’s easier to reheat chocolate than to fix seized chocolate.
- Use good quality melting wafers for the smoothest coating. They set up nicely and give a professional finish.
- Don’t be afraid to get creative with your decorations! Even simple additions like sprinkles can make a big difference.
What’s the secret to perfect Halloween cake pop decorations?
The key is in the consistency of your cake mixture and the tempering of your chocolate. Ensuring the cake crumbs bind well without being too sticky, and melting chocolate correctly, are crucial for smooth dipping and crisp results in your DIY Halloween cake pop designs.
Can I make Halloween cake pops ahead of time?
Absolutely! You can prepare the cake balls and freeze them for up to 2 weeks. For decorated pops, store them in an airtight container in a cool, dry place for up to 3-4 days. This makes party prep a breeze!
How do I avoid common mistakes with Halloween cake pops?
A common pitfall is over-mixing the cake and frosting, leading to dense pops. Also, ensure your chocolate is melted smoothly and not overheated, which can cause it to seize. For more help, check out simple Halloween cake pop tutorials online.
Best Ways to Serve Your Halloween Themed Cake Pops
Once you’ve perfected your Halloween themed cake pops, presenting them is almost as fun as making them! For a truly show-stopping display, consider arranging them upright in a decorated styrofoam block covered in Halloween-themed paper or fabric. This creates a fantastic centerpiece. You could also place them individually in small Halloween-themed paper cups or liners. For a spooky buffet, arrange them alongside other Halloween treat decorating ideas like ghost cookies or candy corn parfaits. They pair wonderfully with warm apple cider or a spooky punch, making your Halloween party complete with fantastic Halloween party cake pop inspiration!
Nutrition Facts for Halloween Cake Pops
When you’re enjoying these festive Halloween themed cake pops, it’s helpful to know what you’re indulging in. Each little pop is a delightful bite of sweetness.
- Calories: 180 kcal
- Fat: 9 g
- Saturated Fat: 5 g
- Protein: 2 g
- Carbohydrates: 23 g
- Fiber: 0.5 g
- Sugar: 16 g
- Sodium: 95 mg
Nutritional values are estimates and may vary based on specific ingredients used.
How to Store and Reheat Halloween Cake Pops
Properly storing your beautifully decorated Halloween treat decorating ideas ensures they stay fresh and delicious for your guests. First, make sure the chocolate coating is completely set – this usually takes about an hour at room temperature or less in the fridge. For short-term storage, up to 3-4 days, place the cake pops in a single layer in an airtight container. You can place wax paper between layers if you need to stack them, but a single layer is best to prevent decorations from smudging.
If you need to store them for longer, the freezer is your best friend! Wrap individual cake pops tightly in plastic wrap, then place them in a freezer-safe bag or container. They’ll keep well for up to 3 months. To reheat, simply transfer the frozen pops to the refrigerator to thaw overnight. Avoid reheating them in the microwave, as this can cause the chocolate to melt unevenly and ruin the decorations.
Frequently Asked Questions About Halloween Cake Pop Decorations
What are the best edible decorations for Halloween cake pops?
Beyond basic sprinkles, consider edible googly eyes for monster pops, black sanding sugar for a starry night effect, or even small candy pumpkins. For truly creative Halloween cake pop decorations, you can pipe intricate spiderwebs with black icing or use edible markers to draw spooky faces on pumpkin pops. Don’t forget edible glitter for a touch of magic!
How do I get a smooth chocolate coating on my Halloween cake pops?
The key is to melt your chocolate wafers slowly and gently, usually in 30-second intervals in the microwave, stirring well between each. Avoid overheating, as this can cause the chocolate to seize. For an even smoother finish, you can add a teaspoon of coconut oil or vegetable shortening to white chocolate. This helps achieve those beautiful, glossy coatings essential for impressive Halloween themed cake pops.
Can I make Halloween cake pops with different cake flavors?
Absolutely! While vanilla is a great base, feel free to experiment. Chocolate cake makes for delicious chocolate-themed pops, red velvet offers a spooky look, and even funfetti can be adapted with Halloween colors. The frosting ratio might change slightly depending on the cake’s moisture content, but the basic binding and decorating techniques remain the same for all your creative Halloween cake pop decorations.
What’s a good way to display my Halloween cake pops?
Presentation is everything for Halloween treat decorating ideas! A popular method is to stick them upright in a styrofoam block covered with Halloween-themed fabric or paper – it looks like a spooky bouquet. Alternatively, you can place them in small, decorative paper cups or even arrange them on a tiered stand. For a truly festive look, scatter some Halloween-themed candies or faux cobwebs around the display.
Variations of Halloween Cake Pops You Can Try
While the classic white cake base is wonderful, don’t be afraid to get adventurous with your Halloween cake pop decorations! Switching up the cake flavor can add a whole new dimension to your spooky sweets. For some fantastic monster cake pop ideas, try using a rich chocolate cake mix for a darker, more decadent base. You can even experiment with red velvet cake for a creepy, bloody effect, or a funfetti cake with Halloween-colored sprinkles mixed in. These variations offer exciting new avenues for your DIY Halloween cake pop designs.
You can also explore different coating options beyond standard chocolate. Consider using candy melts in vibrant colors or even dipping some in a simple glaze. For those looking for lighter options, you might explore healthier cake recipes or even alternative bases like energy balls. And for some truly enchanting ghost cake pop designs, try a simple vanilla cake dipped in white chocolate and adorned with minimal, spooky details. The possibilities for creative Halloween cake pop decorations are endless!
Print
Halloween Cake Pop Decorations: 5 Spooky Creations
- Total Time: 1 hour
- Yield: 24 cake pops 1x
- Diet: Vegetarian
Description
Learn how to create festive Halloween cake pop decorations and designs. This recipe guides you through making spooky and cute cake pops perfect for parties and celebrations. You’ll find creative ideas for decorating your Halloween themed cake pops.
Ingredients
- 15 ounce box white cake mix
- 1 stick salted butter, softened
- 2–2 ½ cups powdered sugar
- 1 teaspoon vanilla extract
- 1 Tablespoon heavy cream or milk
- 5 ounce chocolate melting wafers (dark chocolate)
- 10 ounce package white chocolate melting wafers
- 10 ounces orange melting wafers
- Green frosting
- Black edible ink pen
- Optional: Halloween sprinkles, jimmies, or other desired decorations
Instructions
- Make Buttercream Frosting: In a medium bowl, whip the softened butter until creamy. Add 1 cup of powdered sugar and mix until combined. Stir in 1 teaspoon of vanilla extract. Gradually add the remaining 1 ½ cups of powdered sugar a little at a time. Add 1 tablespoon of heavy cream or milk to achieve a thick, creamy consistency that holds a peak.
- Prepare Cake Crumbs: Once the baked white cake has cooled slightly, crumble it into fine crumbs using your hands or a spoon.
- Combine Cake and Frosting: Add 2 spoonfuls of the prepared buttercream frosting to the cake crumbs. Mix with hands or a spoon, gradually adding more frosting until the mixture holds together when squeezed but isn’t overly sticky or crumbly.
- Form Cake Pops: Using a cake pop press or a medium cookie scoop, scoop the cake mixture and roll into balls. Place the cake balls onto a plate and freeze for about 10 minutes to firm up.
- Melt Chocolates: Just before removing cake balls from the freezer, melt the dark chocolate and white chocolate wafers separately in microwave-safe bowls. Heat in 30-second intervals, stirring between each until smooth.
- Insert Sticks and Chill: Dip the tip of each lollipop stick into melted dark chocolate, then insert it into the center of each cake ball. Return the cake pops to the fridge or freezer until the chocolate sets, securing the stick in place.
- Dip Cake Pops: Pour melted chocolate into a tall glass or skinny jar. Dip each cake pop into the chocolate coating, gently tapping or spinning the stick to remove excess chocolate. Decorate immediately with Halloween sprinkles or other decorations before the chocolate hardens.
- Create Pumpkins: Dip selected cake pops in orange chocolate and allow to harden. Add green frosting on top to mimic pumpkin stems and draw pumpkin faces with a black edible ink pen.
- Create Mummies: After the first layer of white chocolate hardens, drizzle additional white chocolate using a ziplock bag with a small cut in the corner to create mummy bandage effects.
- Dry and Store: Push the finished cake pops into a styrofoam block or a glass filled with rice to keep them upright. Allow the chocolate coating to set completely, about one hour. Store cake pops in an airtight container in a cool place for 3-4 days.
Notes
- Ensure the cake is cooled before crumbling to avoid a messy mixture.
- Do not add too much frosting; the mixture should hold together but not be soggy.
- Use sharp, clean sticks to avoid breaking during dipping.
- Customize decorations with various sprinkles, edible markers, or colored frosting for different Halloween themes.
- Store cake pops in a cool, dry place to prevent melting and maintain freshness.
- Prep Time: 40 minutes
- Cook Time: 20 minutes (cake baking) plus 10 minutes freezing
- Category: Dessert
- Method: No-Cook
- Cuisine: American
Nutrition
- Serving Size: 1 cake pop
- Calories: 180 kcal
- Sugar: 16 g
- Sodium: 95 mg
- Fat: 9 g
- Saturated Fat: 5 g
- Unsaturated Fat: 3 g
- Trans Fat: 0 g
- Carbohydrates: 23 g
- Fiber: 0.5 g
- Protein: 2 g
- Cholesterol: 20 mg








Leave a Reply